BLOGGER TEMPLATES AND TWITTER BACKGROUNDS
Showing posts with label Tutorials. Show all posts

13 March 2011

Lace Edge Paper Flowers

Today I will show you how to make a Lace Edge Paper Flower as seen on this layout below. Making your own paper flowers is an inexpensive alternative to purchasing them at craft stores. I think they also offer a little more versatility too as far as colors and styles. Try making some today and let me know how they turn out!
These are the supplies you will need to make a Lace Edge Paper Flower...

A border punch
Card stock (any color or pattern)
A paper cutter

Using a border punch, ( I used Fiskars Threading Water Punch) punch the length of a 12x12 piece of card stock. You can use solid or printed paper depending on how you will use the finished flower
Cut your punched edge into a strip about an inch to an inch and a half wide. This would also be a good time to ink the punched edge if you choose.
Begin pleating you strip over and under until you reach the end of the strip as shown in the picture
Apply a dab of hot glue to the edge of the strip and adhere it to the opposite side, joining the pleats if you can
Add a button to the center,..and viola! You have a lace edge paper flower!

Pointed Edge Border


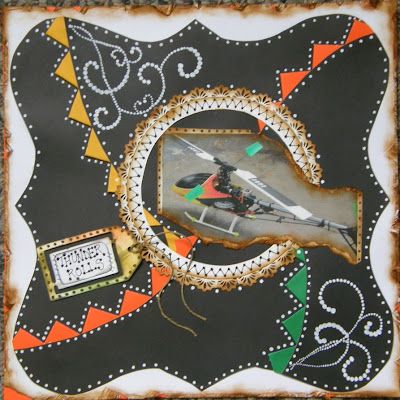
Today I will show you how to make a Pointed Edge Border. In this tutorial , I used it to cut through the center of the layout, but it can also be used right on the edge, in a straight line rather than a curve or almost any way you choose. I like the look of this edge,..it has a lot of dimension.
Start with your background paper. I used a 12x12 piece of cardstock, but any size can be used depending on how you need to use it in your layout
Draw a curved line on your sheet of 12x12 (or any size) paper. The curve can be any style you choose,..be creative!
Cut along the line you drew
Now you are ready to fold your 1x1 squares into points
Fold down the corners of your 1x1 squares as shown in the picture below...
Add a line of hot glue to the front side of the point making sure not to cover the point
Expect a little bit of overhang on the points. These can be easily trimmed away once you are finished gluing on all the points. Check often for symmetry as you are gluing each piece.


Using your hot glue gun, attach the folded pieces of paper as shown in the example below, making sure the points are all that show on the right side of the paper.
Using your hot glue gun,..place the curved piece back over the points, lining them up so the red paper is back to it's original size.
And now you have a pointed edge Border!

08 February 2010

Making Multi fold Flowers

What you'll need:
Hot Glue Gun
Several squares of paper cut 2x2
Ink
Button
Ribbon

Start by folding up one corner of the paper.
Now, fold the paper accordian style all the way across the side with the folded corner.
Use hot glue on the front and back sides and pich them together until set.
Your piece should look like this. Continue folding the other squares the same way. My flower took about 10 squares of paper.
Use the hot glue once again to glue the petals side by side in a circular fashion on a smaller piece of coordinating paper, as shown above.
Once you have glued down all of the petals, ink the edges and add a button tied with a ribbon to the center!


Here are some examples of layouts using these flowers!


Making a Ruffled Paper Border

Adding a ruffled border to a layout is much easier than it looks! It is such a pretty edge to finish your project beautifully!


What you'll need:
Scissors
Hot Glue Gun
Stapler
Paper
To begin, cut strips of paper to your desired width for making the ruffled border. This can be as wide a ruffle as you choose. Now, fold the paper in loose folds only creasing one side completely. This allows the ruffle to stay more curved.
Every few folds, add a staple to help hold the ruffle in place.
I use hot glue to adhere the ruffle to my project. Do small sections at a time, as the glue dries quickly and leaves very little time for adjustments.
Now attach the ruffle to your project as shown.

These ruffles can be used on straight lines and on curves. You may have to remove a staple or two to adjust the ruffle where needed.

Here are a few examples using the ruffled border.

05 February 2010

Wish Upon A Star

This layout was done using K & Company line paper from the Big Best of K & Company Pack. Not really sure which actual pack it's from though.

I used several older elements on this one including the white lacy penned border as shown in my tutorial here....http://bootscraps.blogspot.com/2009/06/this-is-border-i-drew-using-white.html and the rolled roses as shown in the tutorial here......http://bootscraps.blogspot.com/2009/06/two-flowers-one-technique.html.


13 September 2009

Jocelyn


My sister in law took her niece Jocelyn's (pictured above) senior pictures this summer. The photos turned out just beautiful! This is one of the many gorgeous pics! They used the Picnik editing program to make it sepia in color.

I did this layout using K & Co. Wild Saffron paper. The circle was cut in half and one side was used to make the fan or shell looking piece. The other was inked and I used punches to make a swirl of flowers along the edge. I use the Martha Stewart hole punch to make the circles between the flowers. I love this punch as it offers three different size holes to use. I punch out the flowers first then connect them using the hole punch. After punching everything, I glued white paper to the back to add contrast. I completed the circle on the other side using a medium retro punch to make the flowers. I added jewel centers to the flowers and some denim letters to finish the project. Though it's a little hard to see, this is another 3D layout using card board. The picture actually hangs off the side of the layout a bit.

Thanks for stopping in and come back soon!

21 August 2009

California Dreamin


This layout started out as an old Halloween costume made of red velvet. Now that no one fits into the costume anymore, I decide to tear it apart and use the material as a back cover for my layout. I used a hot glue gun (my best friend) to adhere the material to a piece of 12x12 card board. this layout is another of my many 3D layouts. I used paper to make small fans under the bottom scallops. This added a bit more height than I anticipated, so I used card board to build up the rest of the layout so it would be level.

For the title, I used a piece of cream colored ribbon and used rub on letters to spell out California Dreamin. I've never used that technique before and I found that it worked really well. I'll definitely be using that one again!

Thanks for stopping by and come back real soon!

14 August 2009

She's Got A Way


The title is taken from the song by Billy Joel

She's got a way about her
I don't know what it is
But I know that I can't live without her.
She's got a light around her
and everywhere she goes
a million dreams of love surround her
everywhere
She's got a way!

This is a 3 dimensional layout using card board to give lift in certain areas. There are actually three different layers(the bottom scalloped circle, the smaller pink circle and the photograph.).
It's a nice way (thought hard to see in photographs!) to a 3-D effect to your layouts!